最近在看Book of the Dead的demo,其中对HDPR进行修改以构建自己的SRP,于是自己尝试了下。。
一般直接去Github下载对应unity版本的SRP工程:
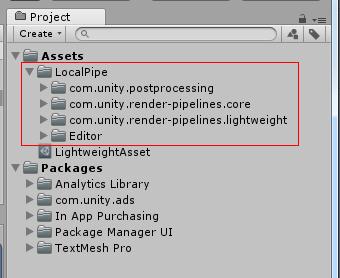
将com.unity.render-pipelines.core和你需要的管线放到统一目录中,它们对PostProcessing有依赖,也需要去github下载一份对应的版本。
下载好后在对应管线的Editor目录下有一个ShaderGraph的文件夹,如果用不到ShaderGraph可以直接删去(旧版本的demo也是删去的)。
注意Assembly Definition的链接可能有丢失,重新绑定一下即可。
目录如下:

下面是重点,shader的链接此时会报错 failed to open source file: 'LWRP/...

本以为2018版本的项目配置里可以配置shader的相对根位置,结果发现是在脚本里。。。。
这个也是Book of the Dead demo里的,所以想要了解管线推荐多看下那个demo。
static class ShaderPathIncludeConfig{ [ShaderIncludePath] public static string[] ShaderPaths() { return new string[] { "Assets/LocalPipe/com.unity.render-pipelines.core", "Assets/LocalPipe/com.unity.render-pipelines.lightweight", }; }} 写一个Editor类,函数挂上ShaderIncludePath特性即可。
这样就可以使用并进行修改了,关掉skybox的绘制测试下,ok:
